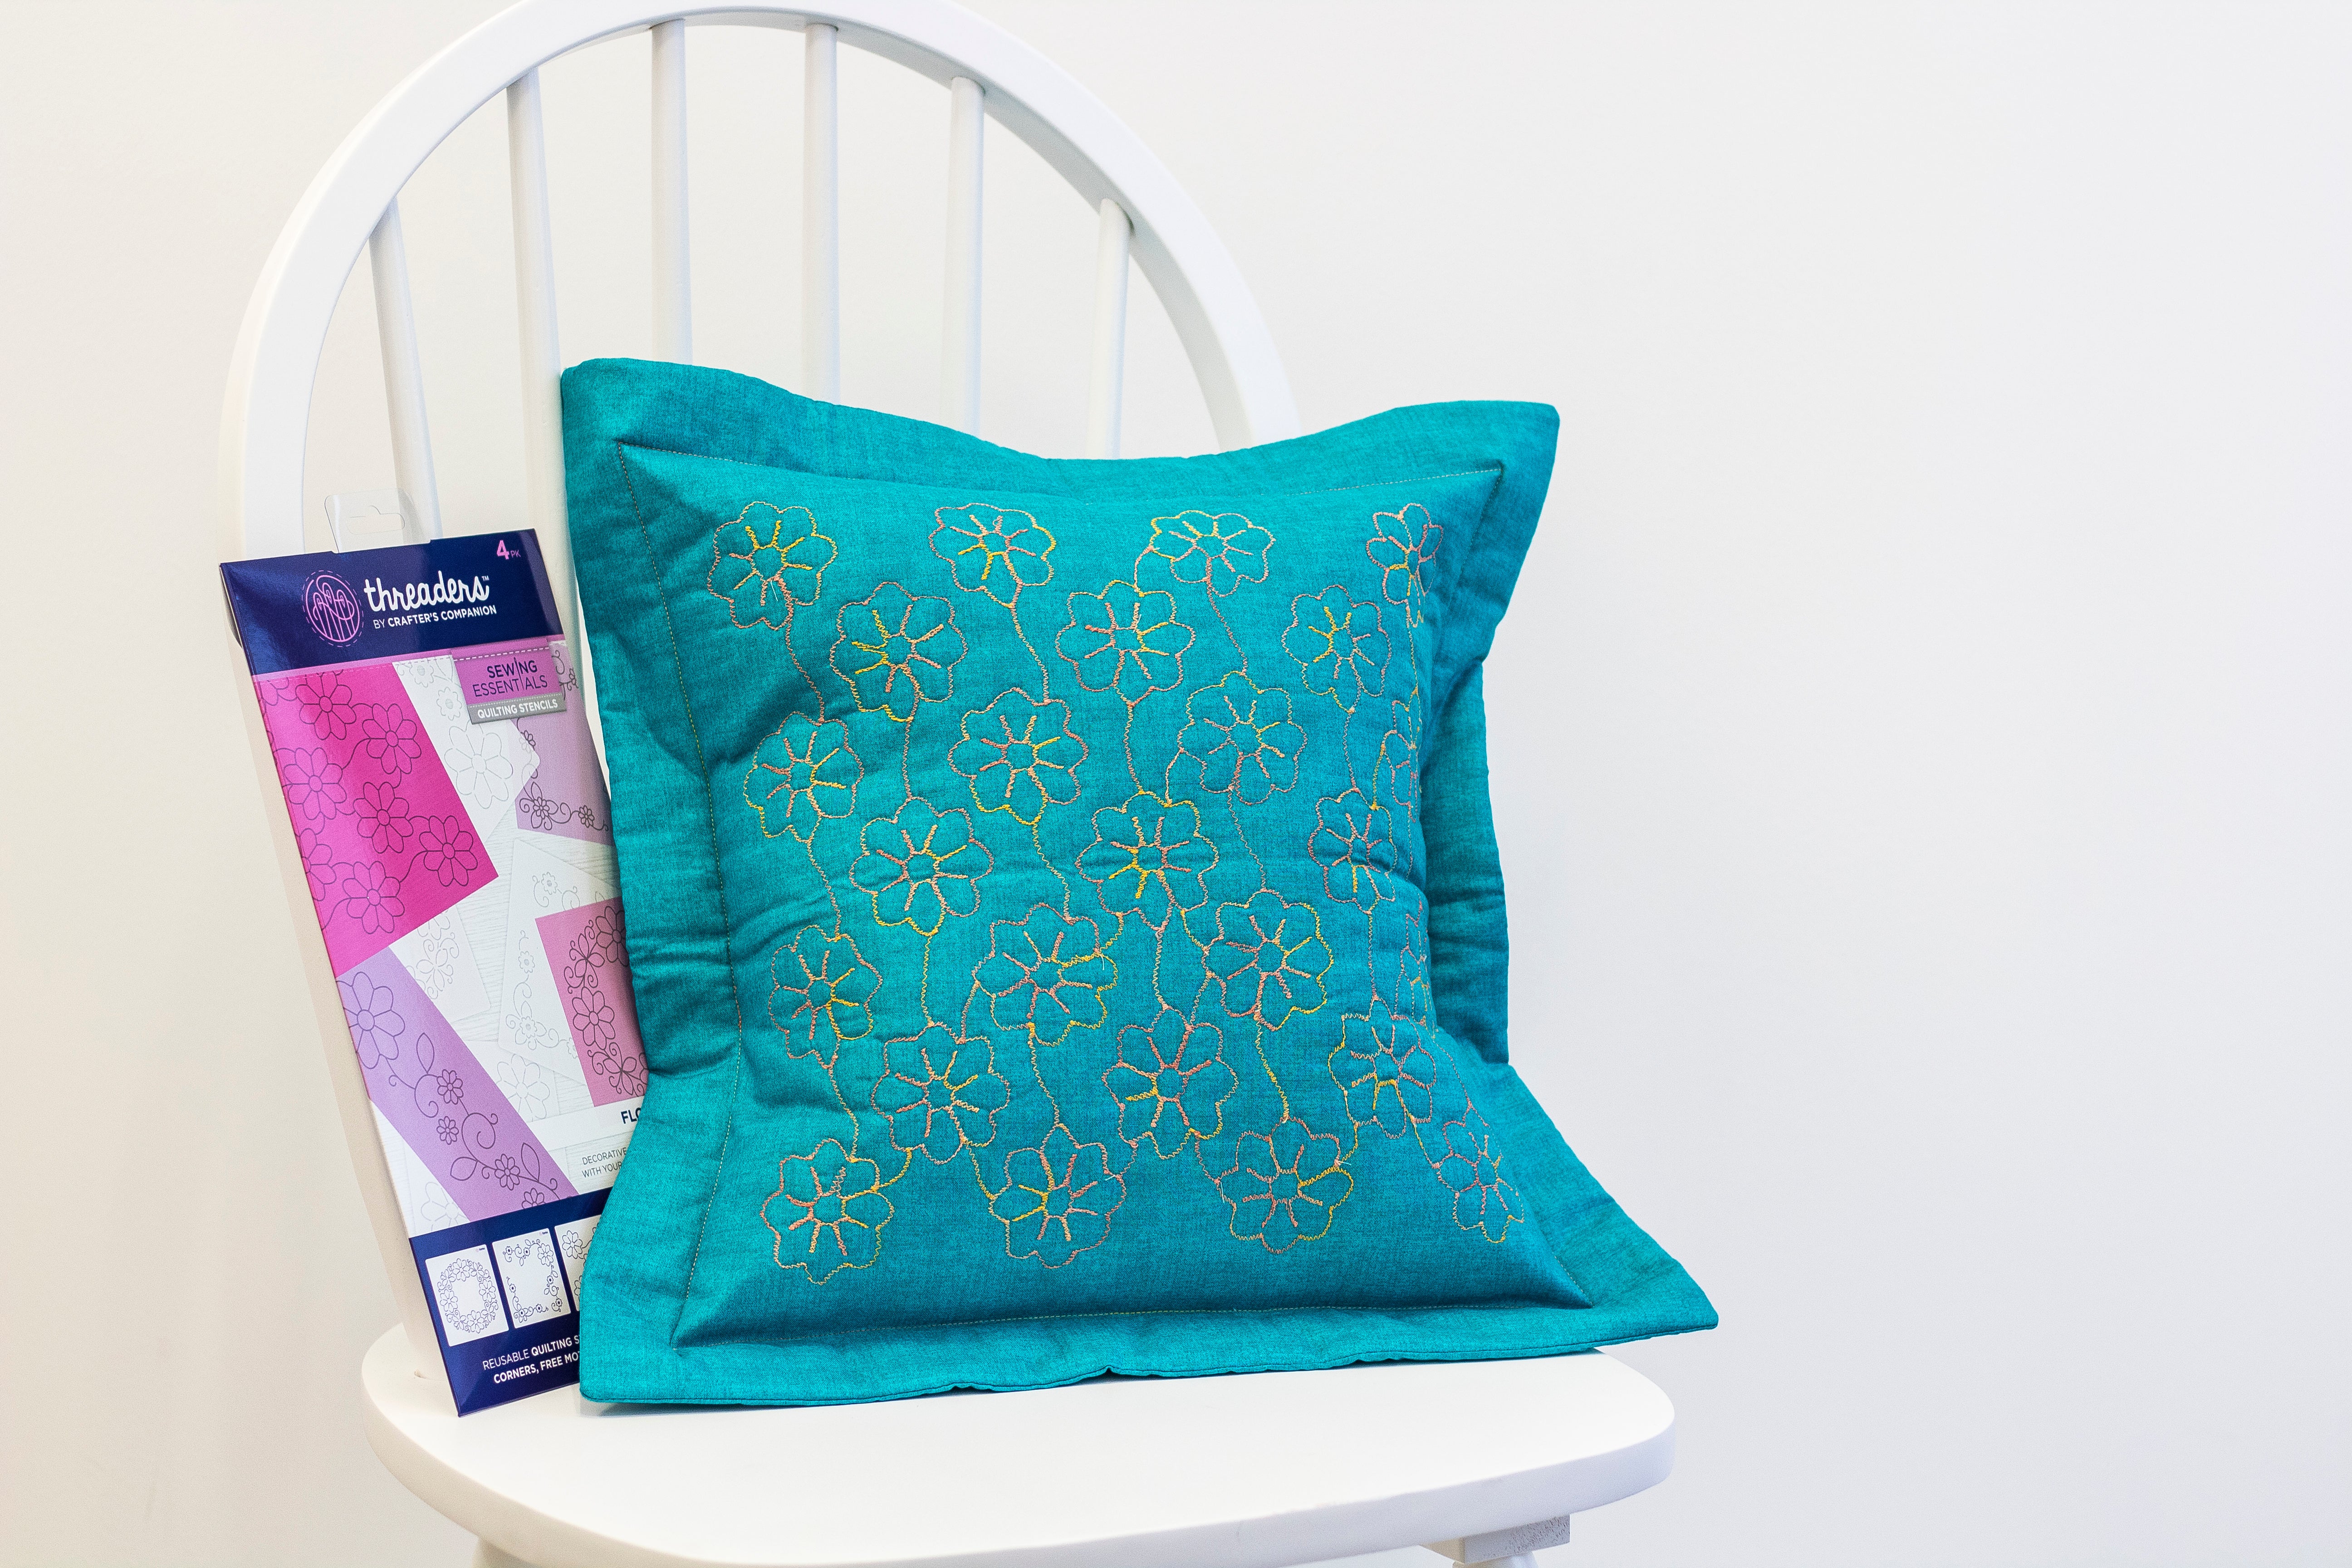
How to: Quilt a cushion cover with Threaders new Quilting Stencils
- Read time: 3 minutes
- Written by: CraftersCompanion
We’re sew excited about Threaders latest Quilting Stencils launch! Our new stencils are reusable and are designed to help you get an an accurate design on your project for ease when stitchingso you can quilt to your heart’s content!
The new range of four stencils have co-ordinating design sets so you can create a quilted pattern theme on your project, they’re perfect to use with Threaders Erasable Fabric Pens and are great for hand and machine quilting.
Angela from our amazing design team has created a fabulous step by step tutorial below to help you create this stunning quilted design on your cushion cover. A great project to help spruce up your home just in time for Spring or to give as a gift!
Here’s what you need to complete this project:
Directions
– 1/2 metre fabric of your choice
– Fat quarter calico
– Variegated thread (we sell gutermann on our website as well as threaders thread boxes that are colour co-ordinated with all of our fabric)
Step 1
Cut out your fabrics as required
-Main fabric: front panel 17.5” x 17”
Back panel pieces x Two- 11.5” x 17”
-Calico: 17.5” x 17”
-Wadding: 17.5” x 17”
Step 2
Prepare front panel
-Fold the front panel in half, finger press the fold.
-Turn 90 degrees then repeat.
-This will give a creased cross in the centre of the front panel.
–Spray baste the wadding onto the back of the panel.
Step 3
Using the stencil
-Line up the centre of the stencil to the centre of the front panel then trace all of the flower design using the heat erasable pen.
-Once all of the flowers are drawn, lift off the stencil then reposition over a flower to continue matching the design.
-Repeat this until the flower design covers the centre of the front panel.
Step 4
Free motion quilting
-Prepare your machine for free-motion quilting with the appropriate foot for your machine, feed dogs dropped, variegated thread in place and a small zigzag stitch.
-Stitch over the drawn design lines, continuing until all of the drawn design is a stitched design.
-Press front panel to remove any traces of the fabric pen.
Step 5
Preparing envelope back of cushion
-Carefully fold over the seam 1/4” and 1/4” again and edge stitch to hold in place. repeat on each back fabric piece and press.
-Sew the hem in place with variegated thread.
Step 6
Making the cushion cover
-Lay out fabric pieces: front facing up with back panels on top facing down, overlapping each other for the envelope back
-Pin in place
-Sew around all four sides of the cushion cover
-Trim corners, turn out and press
Step 7
Finishing the cushion cover
-Using a fabric pen and ruler, draw a straight line border 1.5” in from each edge
-Stitch the square frame using a variegated thread. This gives an Oxford Edge to the cushion cover.
We hope you enjoyed this tutorial! We’d love for you to join our dedicated Facebook page for our sewing customers and become a member of our sewing group here. Share your makes, learn new skills and meet new people who share your passion for sewing!