How to craft an easel card with 3-in-1 Gemini Dies
- Read time: 3 minutes
- Written by: Crafters
Create your own dimensional easel card with a delicate summer vibe with this easy-to-follow cardmaking guide!
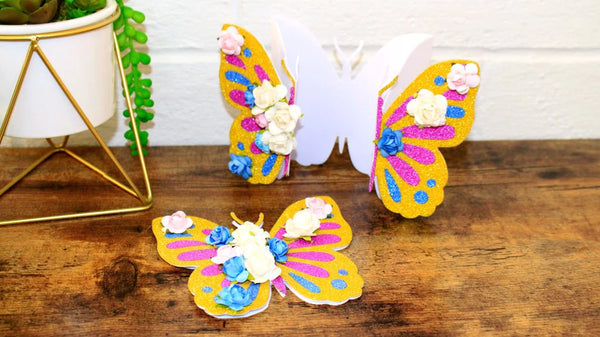
The fluttering butterflies and delicate details in this step-by-step guide are created using the Gemini 3-in-1 Create a Card die collection. And, the name might have given it away but with each set you can create three gorgeous looks. So, why not take a look at the full collection and customise your own easel card to match any occcasion?

You will need:
- Gemini 3-in-1 Create a Card Die – Butterfly Garden
- Gemini 3-in-1 Create a Card Die – Celebration Cake
- Sara Signature Vintage Butterflies Butterfly Kisses Stamp Set
- Centura Pearl Fresh White A3 card
- Pink card
- Green card
- Black StazOn inkpad
- Foam tape
- Collall tacky glue
- Collall all-purpose glue
- Die Cutting Machine
Step-by-step instructions

- First create the card base. Cut a piece of white card to measure to 5 ¾” x 15 ½”. Score at 3 7/8” and 7 ¾”.

- Cut a second extra piece of white card to measure 7 ¾” x 5 ¾”. Glue to bottom section of scored piece to create easel card. Cut a strip measuring 1″ x 5″ and keep aside.

- Next, creating the coloured mats and layers to form a stepped frame effect. Cut two pieces of green card to measure 5 ½” x 5 ½” and one to measure 1.5” x 5”. Glue one to the top piece of the easel card and one to the base. Keep the smaller strip.

- Cut two pieces of pink card to measure 5 ¼” x 7 ¼” and one to measure 1.25” x 5” . Stick the larger pieces on top of the green layers to create mats. Keep the smaller strip.

- Cut two pieces of white card measuring 5” x 7”. Arrange both dies from the Butterfly Garden set onto one piece and die cut using a Gemini machine. Glue to the top section of the card base, taking care not to add any adhesive to the butterfly wings.

- On the second piece of white card. Die cut the outer frame only from the Celebration Cake die set and adhere to the base of the easel card.

- Choose a sentiment from the Butterfly Kisses set and stamp onto the small white strip from step two. Mat onto the strip of pink card then green card and affix to the card base using foam tape (this forms the stopper for the easel card).

- null
- Die cut the outer frames of both the Butterfly Garden and Celebration Cake die sets from green card and paper-piece the leaves back into the main images on the card base.

- Die cut the central butterfly die from the Butterfly Garden set, snip out one of the butterflies and glue to the bottom of the card as shown.

We can’t wait to see your finished makes! So, don’t forget to show us your Easel Card creations on Facebook UK, Facebook USA, Twitter, Instagram UK, Instagram US, Pinterest UK or Pinterest US using the hashtag #crafterscompanion
