How to craft a Christmas gift box
- Read time: 4 minutes
- Written by: Crafters
Gift giving is a great way to show friends and family just how much you care. So, this year why not craft your own Christmas gift boxes that will look fabulous under the tree!
Just follow our straightforward step-by-step instructions to craft a Christmas gift box with gorgeous decoupage decoration.
We’ve used the Crafter’s Companion Winter Floral Decoupage collection to decorate this fabulously festive project. Beautifully illustrated topper pads, co-ordinating dies, stamps and shaped word dies have all been carefully designed to work together perfectly to create dimensional toppers, centrepieces and shaped cards – perfect for celebrating the season!

You will need:
- Winter Floral Decoupage Pad – Festive Bows
- Winter Floral Decoupage Die Set – Festive Bows
- Gemini Shaped Word Die – Holly
- Kraft Card
- Patterned paper
- Coloured or glitter card
- Acetate or foiled acetate
- Crafter’s Companion Glue Tape Pen
- Foam Pads
- Low Tack Tape
- Guillotine
- Scoreboard
- Pencil
- Scissors
- Gemini Die Cutting and Embossing Machine
Step-by-step instructions:
Box & Lid:

- Take two pieces of Kraft card and cut them to 11.5” x 7”.

- Take one sheet. Score all 4 edges at 1 inch using the right side of the scoreboard. This will build the box base.

- Take the second sheet. Score all 4 edges 1 inch using the left side of the scoreboard. This will build the box lid.

- Cut notches into the four corners on the crease lines on both sheets as shown.

- Take the outer die of the Shaped Word Die and place it on the centre of the box lid. Secure down with low tack tape
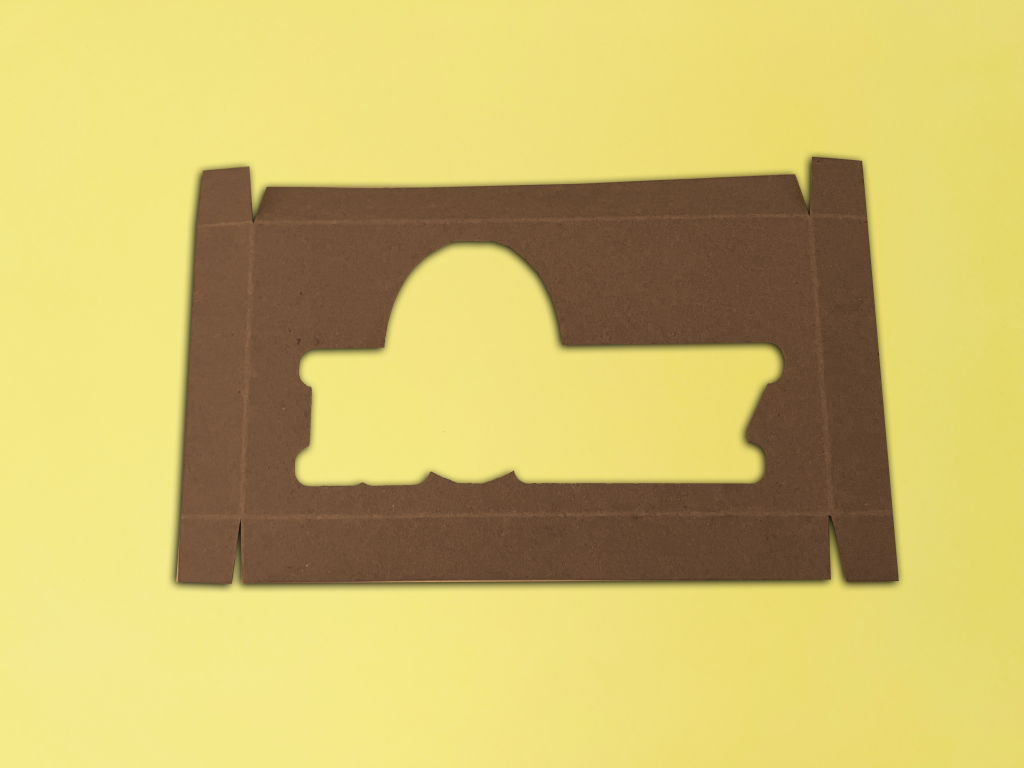
- Run through your Gemini Machine. When it comes out remove the die and snip the top of the letter O to remove the centre piece.

- Take your coloured card and cut two sheets measuring just under 9.5″ x 5″. Take two sheets of patterned paper, cut to 1/4″ smaller as the card pieces. Attach together to create mats and layers as shown.

- Place one of the panels under the box lid. Trace a faint line around the shaped word aperture. Remove the lid and place the shaped word outer die over the outline on the panel piece.

- Remove the lid and place the shaped word outer die over the outline on the panel piece. Run through Gemini machine.

- Die cut the inner die of the shaped word set using the card or paper you used for the base o your layered panel.

- Take a piece of acetate or foiled acetate and cut to measure 9 1/4” x 4 3/4”. Attach to the inside of the box lid.

- Attach the die-cut Holly word onto the acetate on the lid. Then. attach the patterned panel with the die cut aperture on top as shown.

- Add adhesive to the corners of the lid and fold the corners in creating the lid. Repeat with the corners of the box base.
- Attach the second layered panel to the inside of the box base.
Decoupage decoration:
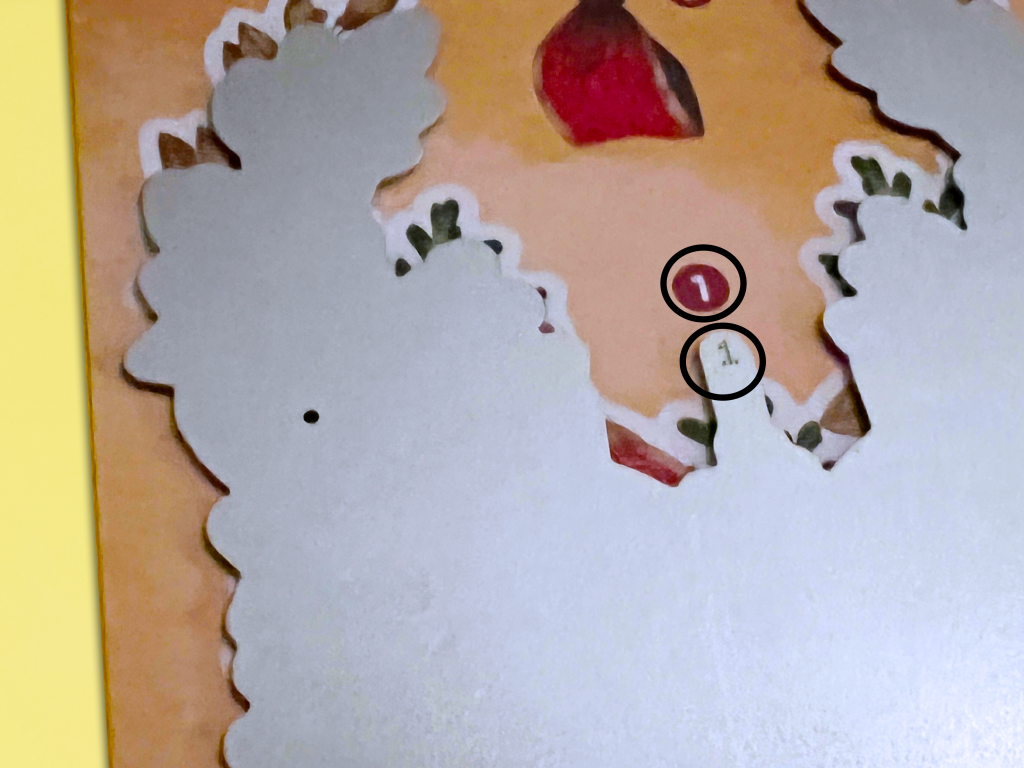
- Take a sheet of Festive Bows decoupage paper and die set.
- Match the number on each die to the corresponding number on the decoupage sheet. This will be your guide to lining up the dies in the correct place.

- Lie all the dies over the decoupage sheets. Secure down with low tack tape and run through the Gemini.

- Take the die cut decoupage pieces two, three, four and five.
- Attach foam pads onto the back of pieces three, four and five.
- Adhere the layers on top of each other going from largest to smallest.

- Attach the decoupage decoration onto the bottom of the O of Holly on your box lid.
- As a finishing touch you can stamp a festive sentiment onto a card piece and attach to the top corner of the box lid.


