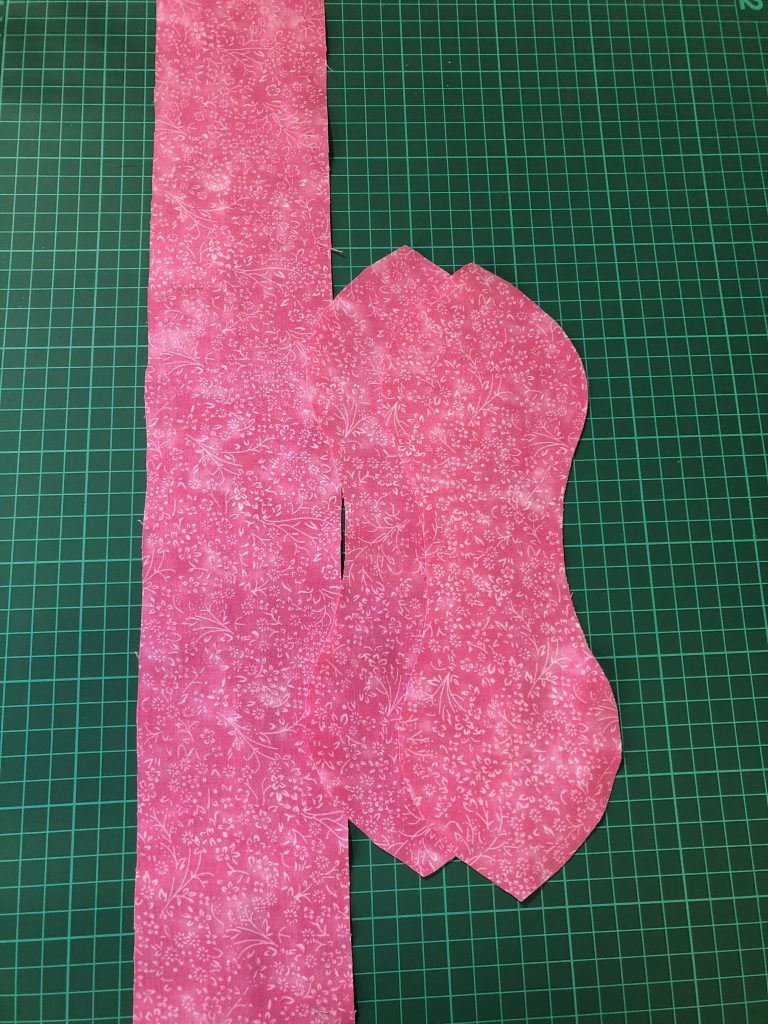
Cut one rectangle of fabric to measure 3” x 19”. Cut 2 pieces of fabric into matching bow shapes as in the image. Fold the rectangular piece in half lengthways.
Starting and stopping 1.5" from the short ends stitch along the raw edge of the folded rectangular piece using a 1/4” seam allowance.
Feed one short end through the length of the rectangle until both the short ends meet up.
Stitch across the short ends
Using the gap in the sides pull the Scrunchie through to the right side
Your Scrunchie is now a circle with a gap in the seam. Iron carefully
Take approximately 8.5 inches of elastic and using a large safety pin feed in through the gap in the seam. Join the ends of the elastic by stitching them together using a small zig-zag stitch
Use a small amount of textile glue to close the gap in the seam and set aside to dry
Place the two bow pieces right sides together and stitch all the way round leaving a 2- 3 inch gap in one side. Trim the points and the curves to reduce bulk
Turn through to the right side and press. Use textile glue to close the gap in the seam
Tie the bow round the scrunchie covering the glued seam in the process