Have a Nordic Christmas with Sara's Signature Scandinavian Collection!
- Read time: 2 minutes
- Written by: Rebecca.Whitehead
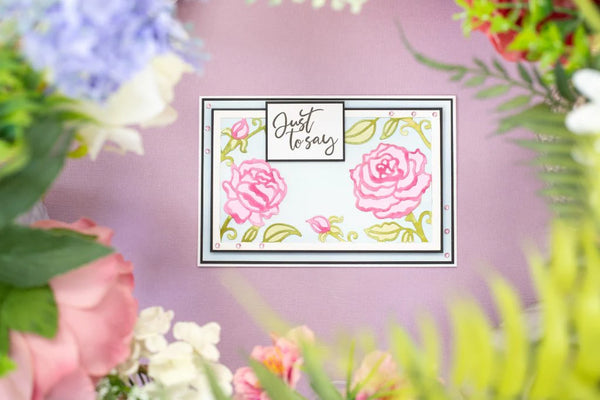
Use your new Scandinavian Christmas goodies to make stunning cards like this one from Marie Jones!

You will need:
Crafter’s Companion Supplies
Sara Signature Scandinavian Christmas- Partridge in a Pear Tree die
Sara Signature Scandinavian Christmas- Swedish Snowflake die
Sara Signature Scandinavian Christmas- Traditional Folk embossing folder
Sara Signature Scandinavian Christmas- Nordic Patterns stamp set
Sara Signature Scandinavian Christmas- ‘Tis the Season stamp set
Sara Signature Scandinavian Christmas- Bakers Twine
Other Supplies
Distress ink pad – Candied Apple
VersaMagic – Red Magic ink pad
Red Gems
Directions

- Score and fold a sheet of A4 white card in half to create card blank. Cut white card 20cm x 13.5cm, matt onto Xmas Red Centura Pearl card and attach to card front. Die-cut Swedish Snowflake from white card. Matt onto Xmas Red and attach to card front. Emboss a strip of white card with the Traditional Folk Border and colour with Candied Apple Distress Ink. Attach next to the first strip.

- Cut a strip of white card 2.5cm x 17cm. Use Red Magic ink to repeat stamp one of the Nordic Patterns to cover the card. Attach to card front.

- Cut white card 6cm x 11cm, wrap Bakers Twine around one end and attach to card across the strips.

- Die-cut the Partridge in a Pear Tree from Xmas Red Centura Pearl card. Draw around the outside edge of the die onto white card and carefully cut out. Attach the die-cut tree to the white card and attach to card front with 3D glue gel.

- Stamp the sentiment with Red Magic ink, matt onto Xmas Red card and attach to top of card with 3D glue gel. Add gems as shown to finish.
Tip
When drawing around a die to create a matt, lay the die with the cutting side facing up so that the die if flat on the card.
Crafty Hugs,
CCUK