Flower Forming Foam 101
- Read time: 9 minutes
- Written by: Crafters
The day is finally here! Our Flower Forming Foam range has gone global and we hope that you’re just as excited to get stuck in with it as we are. To celebrate the full launch of this beautiful range, we thought we’d write up a little 101 guide to help you get started. We know how daunting it can be when you first get your hands on a load of new products, but this blog post will give you that boost you need!
What is Flower Forming Foam?
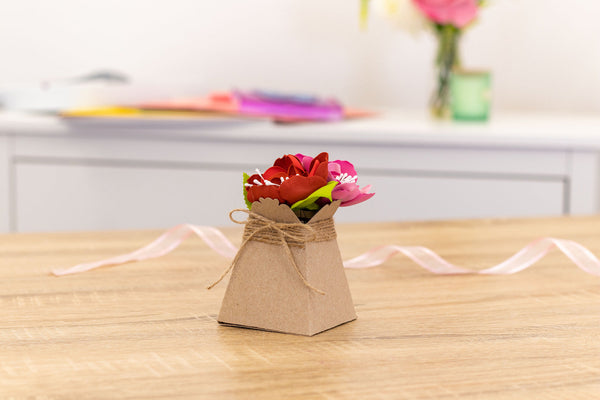
This whole range is focused around the idea of creating 3D floral embellishments for papercraft and multi media projects by using our specially formulated foam. This foam can be die-cut and heated to be distressed, twisted and stretched to be transformed into the most realistic petals. Once formed, they can be adhered or used in a variety of projects, such as cards, invitations and gift tags, or more multi media-based projects, like table decor, garlands and headwear. It’s such a versatile collection and it’s perfect for those of us that want a bit of oomph in our creations.

Which flowers can you create?
In our current line, we have three floral dies, which are Lily, Peony and Clover. Each set contains a selection of dies to help you create petals in a variety of sizes, which will further the depth and dimension of your flowers. Each of these designs are perfect for spring and summer projects, so mix and match them to create a meadow effect.
Make sure you keep your eyes peeled in the future for more flower designs – you could end up with a whole garden!
These dies are also perfect for using with paper, card and tissue paper, so you’ll be able to produce flowers for practically any project.
Are there any accessories available?
In order to help you make the most realistic flowers possible, we’ve released a selection of accessories that pair up perfectly. These include:
- Leaves & Vines Die – use these dies with the foam to shape lovely leaves and foliage, adding a bit more pizzazz
- Traditional Doily & Border Die – these dies can be used with the foam or with paper and card to produce extra embellishments for matting and layering
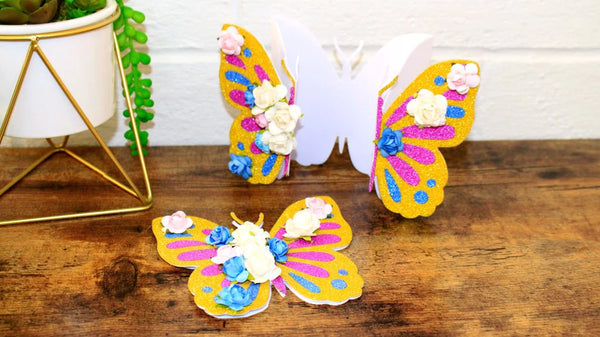
- Dainty Butterflies Die – this pack of dies contains butterflies in various sizes, giving you the opportunity to add a flurry flutterbies
- Flower Stamens in Natural White, Floral Bouquet and Metallic – stamens make up the central point of a flower, so use a cluster of them in the middle of your creations to bring the design to life
- Four Moulding Ball Tools – in order to get that round, cup effect on your flower, use the Moulding Ball Tools. These double-ended tools give you eight sizes in total, so you can create large cups or closed cup flowers
- Petal Distress Tool – this tool is ideal for adding a distressed edge to your petals, adding even more realism
Which foam colours are available?
Alongside all of these dies and accessories, we have released three packs of foam. Each of them have seven sheets of specially formulated foam inside and two of the packs match up to the stamen shades. This means you have:
Natural White – each sheet is a smooth white shade, which you can use blank or add colour to for personalised projects and depth
Floral Bouquet – a pack of pastels, such as pinks and yellows, giving you a traditional spring feel
Foliage Greens – this pack is perfect for using with the Leaves & Vines Die because it’s full of gorgeous green shades

How do you colour the foam?
As we mentioned, there is white foam available that is ideal for colouring, but you can also add colour to the pastel and green foam if you wish! The best bit about this is that it’s so easy to do, so if you wanted to add some extra detail, this is the way to go.
- Die-cut the petals that you require from your chosen foam and lay them on to a glass cutting mat.
- Pick your favourite Spectrum Noir Water Reactive Dye Inkpad and use a slightly damp sponge or blending tool to pick up the colour.
- Gently blend it on to the petals, taking care not to make the foam too wet. We love the effect of dragging the colour from the petal tips and fading in towards the centre, but you can experiment with colour and effects to suit your tastes!
- Once you’ve added your colour, proceed with heating and manipulating the foam as you like.
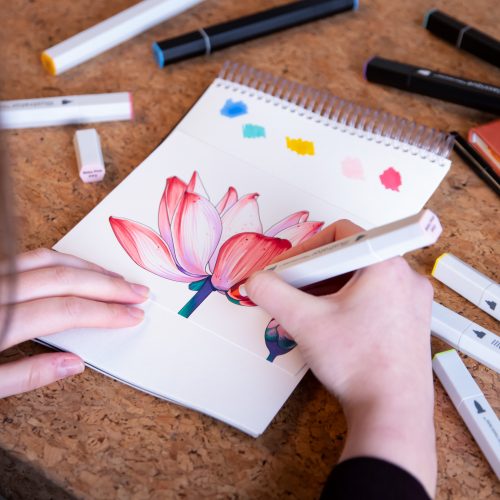
You can also add stripes, dots or solid colour with markers, if you would prefer.
How do you heat the foam?
There are several ways that you can heat your foam – it’s all about finding out what works best for you and experimenting with different techniques. Try heating your foam with:
- A craft iron – if you’ve got a craft iron handy, you can press your flowers gently against the hot metal using a pair of tweezers
- A small home iron – you don’t need to have a craft specific iron! If you have small home iron, you can use it in the exact same way
- A heat gun – if you’re into heat embossing, the chances are that you’ve got a heat gun at home, and it would be perfect to use for heating your foam
- A lighter – for this, you need would need to take extra care and precautions, but a lighter is ideal for heating targeted areas of the foam, such as the edge of the petals
- Your hands – while this method may take a little while longer than the others, you can warm your foam up with your hands. Just place the petals on one hand and close your other hand over the top!

How do you build a flower?
Now that we’ve talked about all the different elements, it’s time to build a flower. Don’t worry, it’s not as scary as it seems! All you’ll need are your flower dies, your chosen foam, the stamens, your heating method and a hot glue gun.
- Die-cut your petal shapes from your chosen foam. You can also add colour as you wish!
- Take the largest petal shape and heat it using your preferred method. The edges should start to curl in slightly, which means it’s ready for moulding.
- To get a rounded petal effect, take a Moulding Ball Tool and push the petal into a foam sponge, twisting and rounding to form the shape. You can also use the Petal Distress Tool by laying the heated petal on to the silicone tray and running the finger tool over it to create a rough edge effect. If you don’t have tools, you can get experimental with twisting, crinkling, scrunching and curling your petals by hand.
- Repeat the manipulation process with the smaller petals until all of your petals are complete.
- Warm up your glue gun, then add a blob into the centre of the largest petal shape. Stick the next smallest petals on top, then add another blob of glue to the centre of the petal shape and stick the next smallest on top. Continue until all of your petals have been used.
- Take a pokey tool, pencil or another sharp point and poke a hole through the middle of the layers.
- Gather up a group of stamens and add a blob of hot glue around them, close to the top, then pull them through the hole that you created in the flower until they sit in a natural position. Trim the excess from the bottom and your basic flower is done!
From this point, you can create leaves, manipulate them following the same steps, then glue them on with the hot glue.
What types of projects can I use them on?
Our most favourite thing about Flower Forming Foam is that it’s so versatile. As we said in the beginning, your foam flowers can be used across a variety of projects, so here is a handy list of suggestions:
Cards and invitations
Gift tags
Wreaths and garlands
Photo frames
Table decor and centrepieces
Faux bouquets
Doll house accessories
Hair accessories
Box embellishments
Easter baskets
The possibilities really are endless! Take a look at this gallery below for some beautifully unique ideas.
Phew! We think that covers pretty much everything to do with the Flower Forming Foam, but if you have any other questions, please don’t hesitate to contact us!
We absolutely can’t wait to see what you create with your Flower Forming Foam, so make sure show us your creations by tagging your photos on Facebook, Twitter or Instagram using the hashtag #crafterscompanion.


