Create a papercraft umbrella
- Read time: 3 minutes
- Written by: Crafter's Companion
It may be summer, but here in the UK the showers never stop, and there’s always a need for an umbrella. Whilst an umbrella made from paper may not be useful outdoors, it certainly adds bundles of character indoors!
Follow our step by step below to create your own.
You will need:
- 2 pieces of paper from your favourite paper pad measuring 12”
- Bone folder
- Scissors
- Hot glue gun
- All purpose glue
- Red Liner tape
- Gilding flakes
- 1pc Straw
Getting started:
- Take one piece of 12” paper and fold it corner to corner. Unfold and fold opposite corner to corner to create a cross then unfold and fold the bottom up to the top.


2. Unfold and the left side to the right side. Unfold and then fold the side in and top down to create a triangle.

3. Lift one of the wings up to the centre, open it out. Flatten that wing down and fold this new little wing over in half. Do the same on the opposite side the turn over and repeat on the other side.

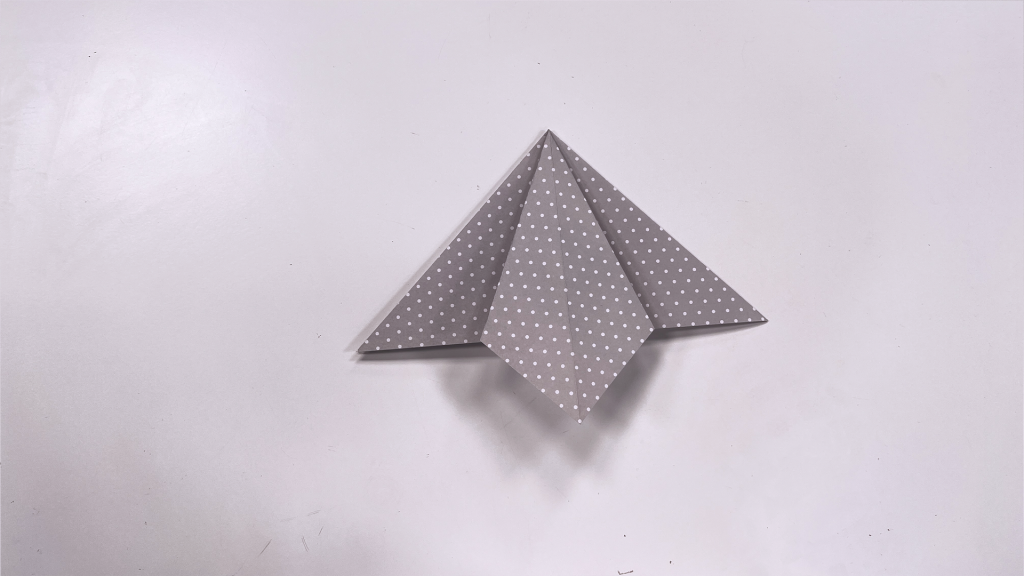
4. Similar to before, lift one of the side up to the centre and open out. It might help to push a pencil to the tip of the wing if needed. Flatten that wing down and fold this new little wing over in half. Repeat this process on the other 7 wings.


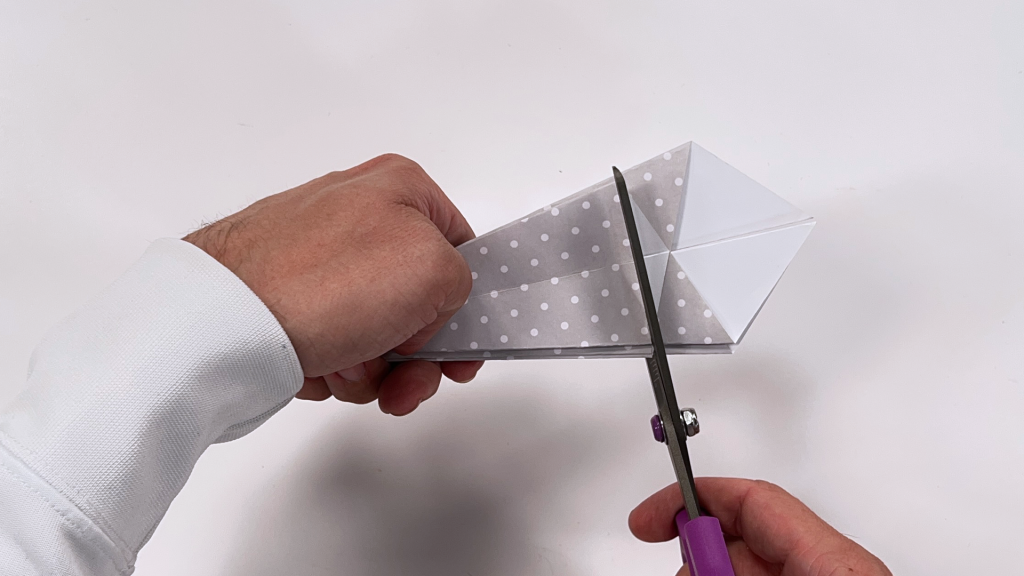
5. Take the scissors and cut straight across where the paper ends. Open out and that should create you basic shape. Repeat this process with some complimentary paper.

6. Take the paper piece that you want to be the underneath part of the umbrella and make two cuts just over half way down from the point. Make sure the cuts are towards the widest part of the paper and there should be a 1cm gap form the end of the cut line to the centre fold.
7. Carefully unfold the paper and slowly go round the outside and where there was a fold line refold the opposite way. Take your time and go all the way round and circle.


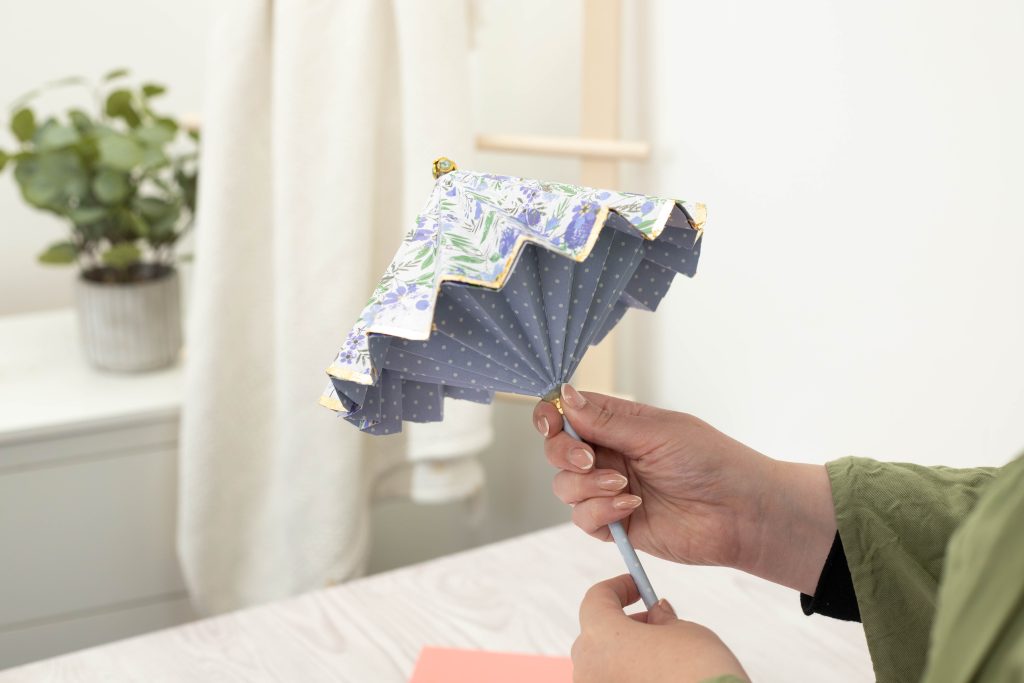
8. If you want to add and gilding flakes to the top part of the umbrella now is the chance to do it. Just line the edges with some adhesive and cover in gilding flakes.
9. Lie the top part of the umbrella face down the lay the bottom part face up. Line up the fold so that they match up and when you are happy, glue the two parts together making sure not to get any in the middle part of the umbrella.
Once glued, slowly fold the umbrella inwards itself ensuring that all the folds go the correct way.


10. Take a straw and wrap it with the 12″ strip of paper. Insert it into the base of the umbrella.

11. Slowly poke the tip through the top of the brolly until about ½ and inch is sticking out. Go around and add hot glue to the tip ensuring you are covering both the straw and the top of the umbrella


Your beautiful papercraft umbrella is now complete!

Decorate your home and share with us on social media! Follow and tag us on Facebook, Instagram, LinkedIn, or TikTok or use the hashtag #crafterscompanion.